D-Link DCS-942L
Закладка: Setup. Раздел: Setup Wizard.
In this section, you can setup the IP camera's network interface settings. If you are configuring this device for the first time, D-Link recommends that you select the Internet Connection Setup Wizard, and follow the instructions on screen. If you wish to modify or configure the IP camera settings manually, you may select the Manual Internet Connection Setup to input the network setting.
In this section, you can setup the IP camera's Motion Detection settings. If you are configuring this device for the first time, D-Link recommends that you select the Motion Detection Setup Wizard, and follow the instructions on screen. If you wish to modify or configure the Motion Detection manually, select the Manual Motion Detection Setup.

Раздел: Network. You can configure your LAN and Internet settings here.

Раздел: Wireless Setup. In this section, you can setup and configure the wireless settings for your camera. Нажимаем на кнопку: Enable Wireless (включить беспроводное соединение).

Changes saved.
The camera is currently restarting. Please wait 61 seconds. Web Server is restarting. Please wait for 1 minute and then re-connect the camera with the newly IP address.
Don't unplug an Ethernet cable from the camera during restarting process.
Запустится обратный отсчет...

При поставленной галке перед пунктом Wireless, будут доступны следующие настройки:

Раздел: Dynamic DNS.
The Dynamic DNS feature allows you to use a domain name that you have purchased (www.yourdomain.com) to access your camera with a dynamically assigned IP address. Most broadband Internet service providers assign dynamic (changing) IP addresses. By using a DDNS service, you can enter your domain name to connect to your camera no matter what your IP address is.
Sign up for D-Link's Free DDNS service at www.DlinkDDNS.com.

Ставим галку перед пунктом: DDNS. Станут доступными настройки Dynamic DNS Settings:

Раздел: Image Setup. Your changes made for the image settings will be reflected immediately. The results can be seen and found in the Live Video window below.

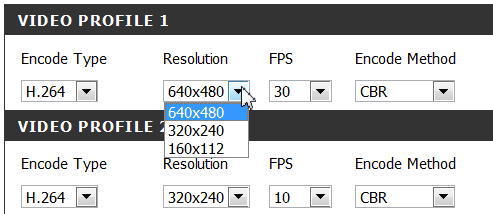
Раздел Audio and Video. You may configure audio and video settings (4 video profiles) here. Profile 3 has been set for snapshot, and profile 4 is set for your mobile phone or PDA device.

Encode Type: выбираем видео кодек — JPEG, MPEG4, H.264.

Resolution: выбираем разрешение 160х120, 320х240 и 640х480.
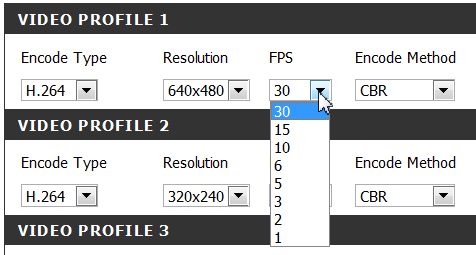
FPS: выбираем частоту кадров от 1 до 30.
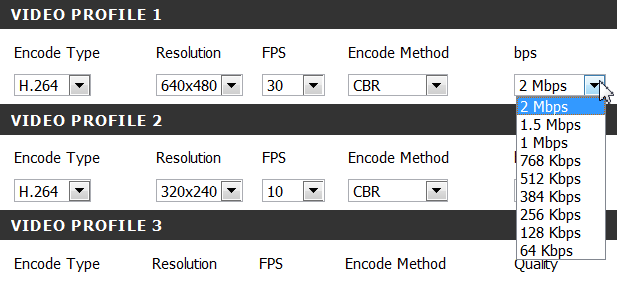
Выбираем Encode Method: CBR (постоянный поток) или Quality (качество).

Битрейт видео, можно выбрать в диапазоне: от 64 Кбит/с до 2Мбит/с.
Day/Night Mode – выбираем режимы День/Ночь, из доступных вариантов: Auto (автоматический), Manual IR (ручной IR), Always Day Mode (всегда дневной режим), Always Night Mode (всегда ночной режим), Schedule (по расписанию).
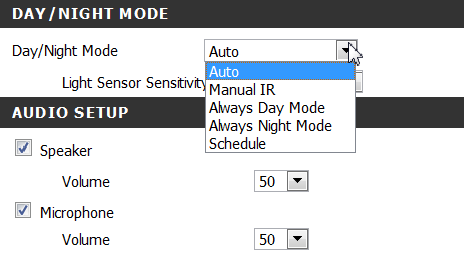
Light Sensor Sensitivity – выбираем чувствительность сенсора: High (высокая), Medium (средняя), Low (низкая).
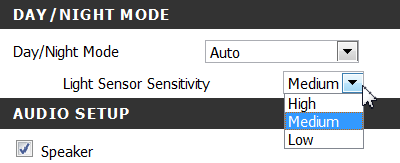
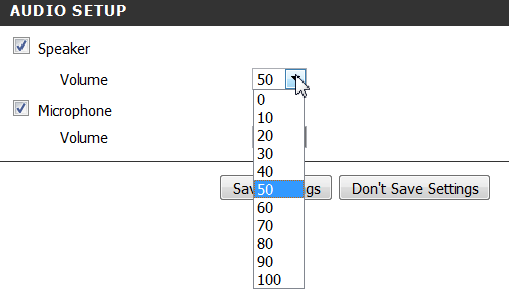
Audio Setup – настройки аудио. Volume Speaker/Microphone – громкость спикера/микрофона, доступны значения от 0 до 100.
Читаем далее.
